
To get started with column formatting in SharePoint there are currently three options:
- You can apply the predefined column formatting that is already available in SharePoint Online
- You can copy-paste standard example from Github
- Or you can start writing your own JSON
In this post we will discover how to apply the standard column formatting. In later posts I will try to make you comfortable writing the code yourself.
Please note that column formatting is only supported in the SharePoint Modern Experience. And although column formatting is also available in SharePoint 2019… the method below is not available in SharePoint 2019.
Let’s get started with the easy one.
Apply standard column formatting in SharePoint online
The format column option is mostly a conditional format that can be applied to a column. This is great because writing conditional format statements yourself isn’t very straight forward.
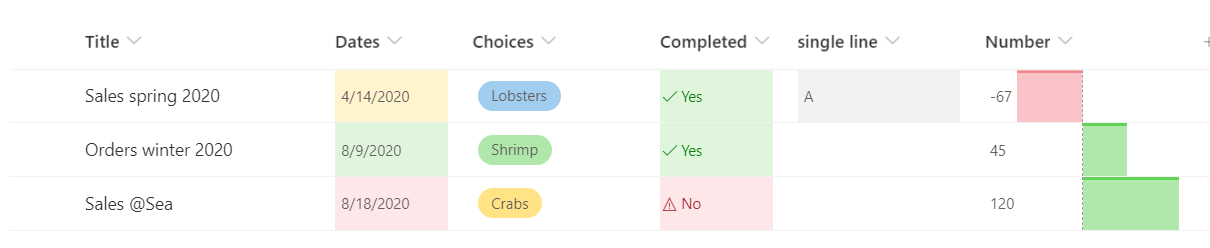
So let’s assume we have a simple Yes/No-column called “Completed” and we obviously want to change the colour of the cell based on the current value.
- Let’s click on the triangle next to the header
 , select Column settings
 ![[2]](https://exceltrainer.be/wp-content/uploads/2020/08/2_two.png) and Format this column
and Format this column ![[3]](https://exceltrainer.be/wp-content/uploads/2020/08/3_three.png) .
. - This will open the panel on the right-side.
It is interesting to see that we can now toggle between the different columns and even the entire row![[4]](https://exceltrainer.be/wp-content/uploads/2020/08/4_four.png) .
.
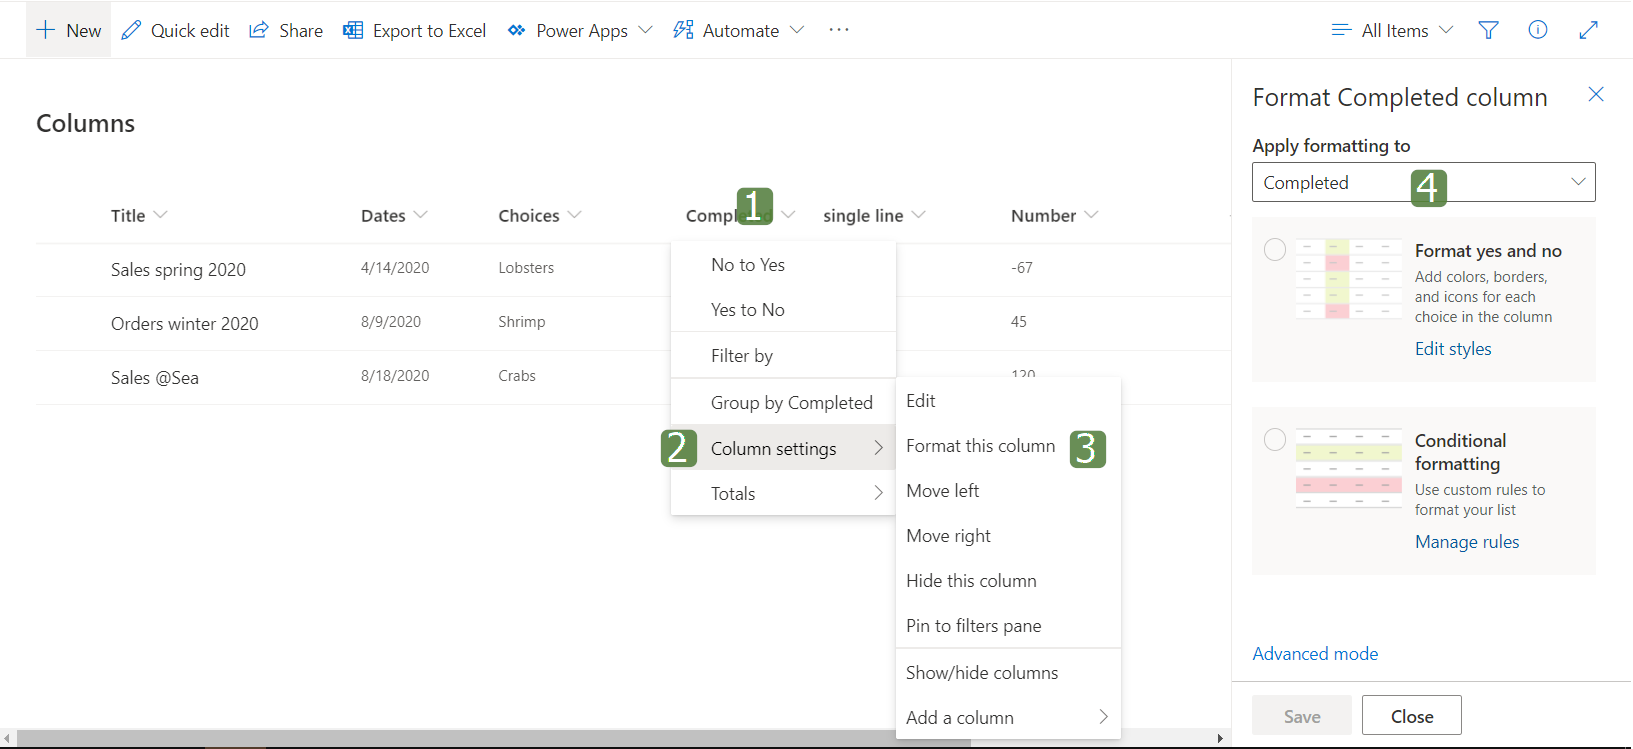
- We select Format yes and no , this will show us a preview straight away. Nice!

Now we could be satisfied already, hit the Save button at the bottom of our screen, and enjoy the compliments of our co-workers.
But let’s become more adventurous and customize the format somewhat.
On a format-adventure
- We click on Edit Styles, and as you can see in the image below we can now define the look and feel of both options Yes and No.
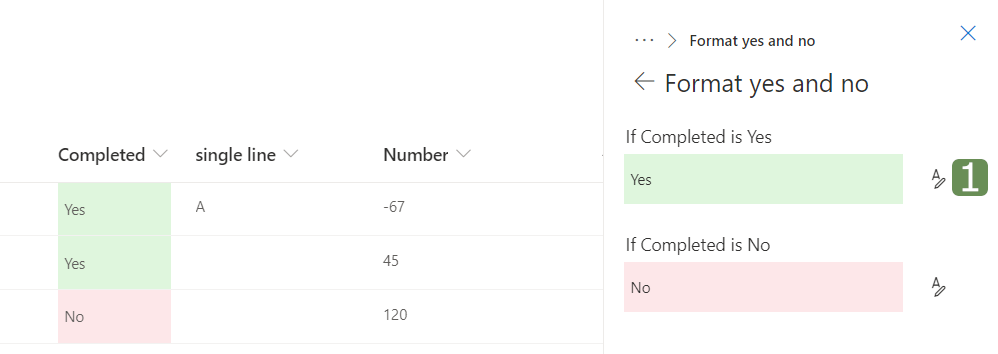
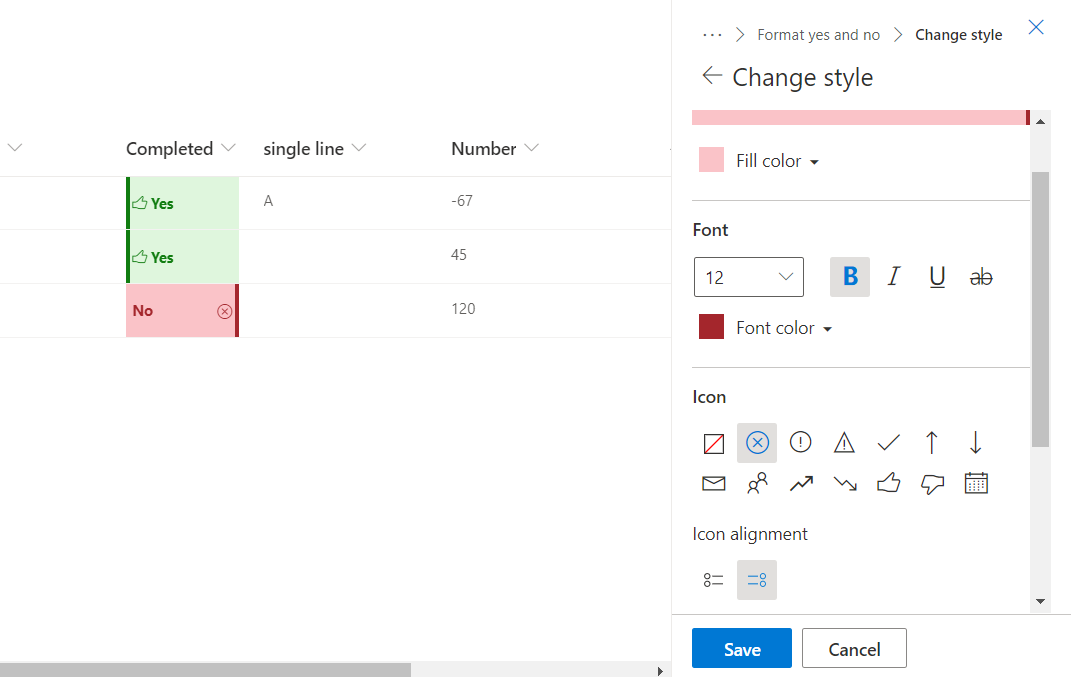
- We click on the button next to the preview to start the customizations. If we wouldn’t know better, we might think we can only change the colour.

- But when we click on More Styles , the real magic of this adventure opens up. Because next to the background (Fill) colour, we can now select an icon, borders, font (size, colour… ), and every change we try is still shown in preview straight away.
- We select a few options
- font in Bold
- font colour in Dark green
- A thumbs-up icon in front
- and finally a heavy dark green border on the left side
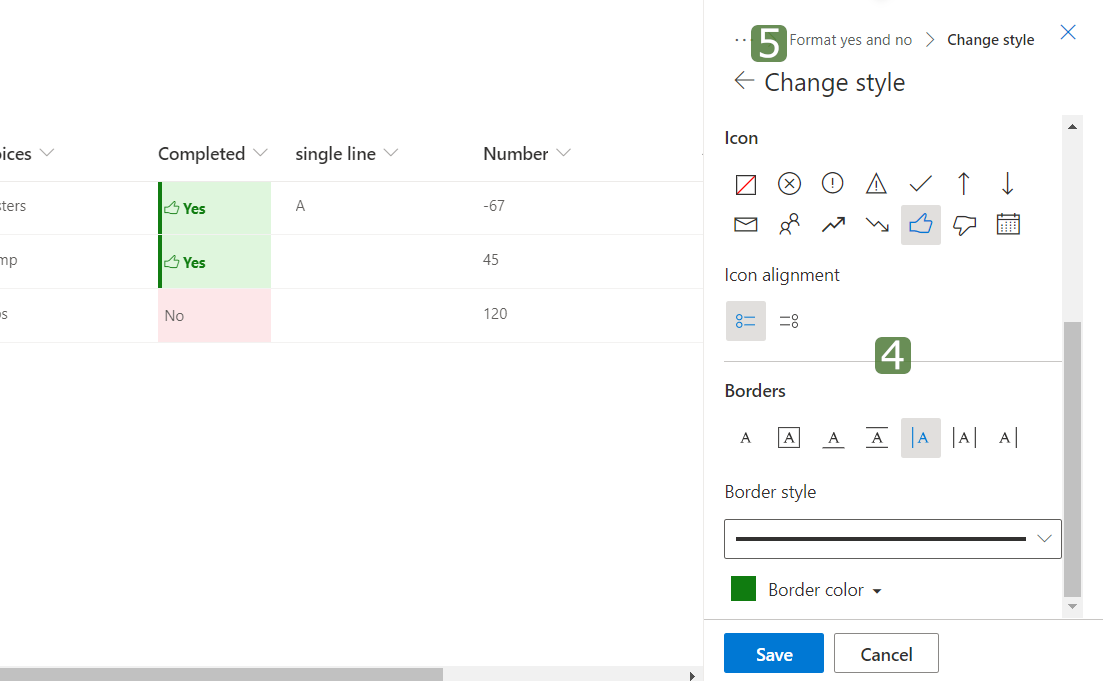
Now that we have completed the “Yes”-option, it is time to design the “No”.
- We click on the “Format yes and no”-breadcrumb
![[5]](https://exceltrainer.be/wp-content/uploads/2020/08/5_five.png) at the top of the pane to return to the previous step.
at the top of the pane to return to the previous step. - Now we can perform the same kind of format for the “No”-option.
- And last but not least, we click on Save.